![]()
This is a step by step beginner guide shows how to check local network IP and public IP in both IP4 and IPv6 via either graphical interface or Linux commands in Ubuntu 20.04.
1. Find IP address via System Settings:
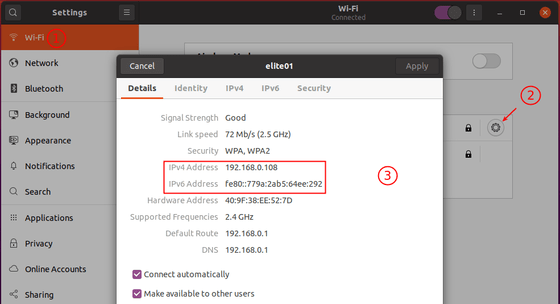
For the default Gnome desktop, you can check the wireless network IP address via:
- Open Settings and navigate to Wi-Fi in left pane.
- Click on the gear icon after the connected wifi network.
- In the pop-up it shows the detailed information including your IP address.

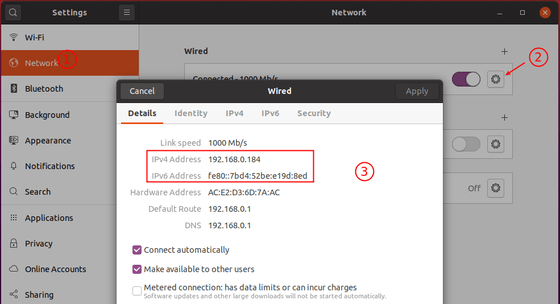
To check the wired network IP address, do:
- Open Settings and navigate to Network in left pane.
- Click on the gear icon under connected wired network.
- In the pop-up it shows the detailed information including your IP address.

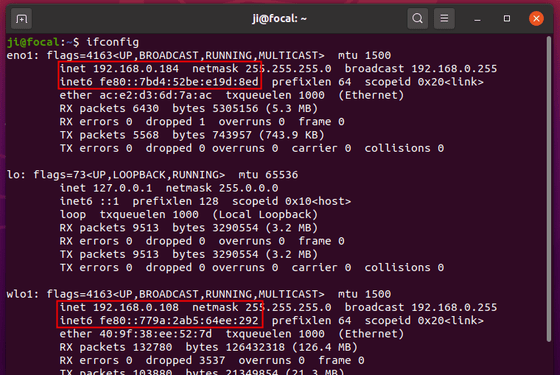
2. Check Local IP address via ifconfig command:
For other desktops or Ubuntu server without an UI, you can run ifconfig command to find your IP.
ifconfig
If the command does not exit, run command to install it: sudo apt install net-tools

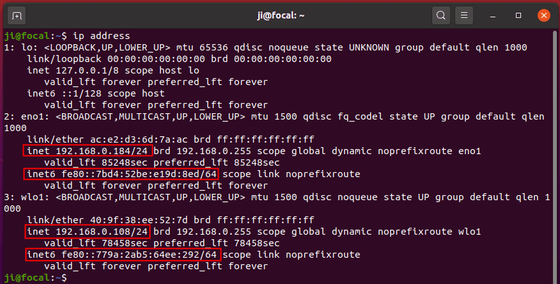
3. Check Local IP address via ip command:
There’s another command looks more straightforward. Simply run:
ip address

4. Check Your Public IP address:
You can search your public ip via Google or other web search engine. If you don’t have a web browser or you’re on Ubuntu server, following commands will tell the public IP.
ifconfig will tell the public IP if you are not behind a router.
Or you can run command in console:
curl https://ipinfo.io/ip


