
Oracle announced Java 18 a few days ago. Here’s how to install the programming language in Ubuntu Linux.
What’s New in Java 18:
- New Oracle Cloud Infrastructure (OCI) native service to help manage Java runtimes and applications on-premises or on any cloud.
- Sets UTF-8 as the default charset of the standard Java APIs
- A command-line tool and API to start a minimal web server that serves static files only.
- Reimplement core reflection with method handles
- Internet-Address Resolution SPI.
- JEP Code Snippets in Java API Documentation.
- Vector API (Third Incubator)
- Foreign Function and Memory API (Second Incubator)
- Pattern Matching for Switch (Second Preview)
Install JDK 18 in Ubuntu:
This Ubuntu PPA maintains installer script for automatically installing Java. It however does not update for the new Java 18 release.
So here’s the step by step guide shows how to install the official deb and set as default manually.
1. Download Java package
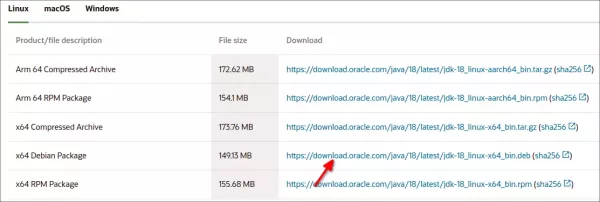
Firstly, go to oracle website and select download the .deb package:
It’s a 64-bit .deb package for modern PC and laptops.
2. Install the .deb package
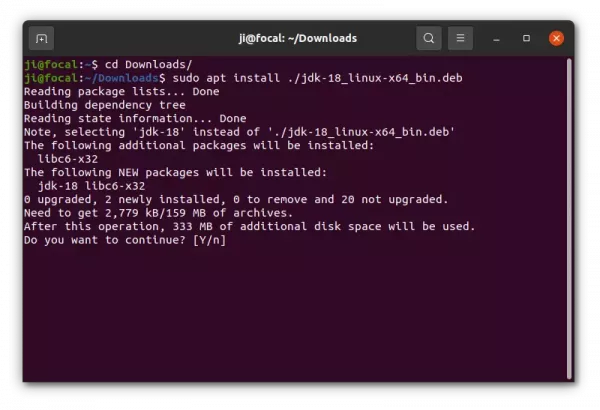
Next, press Ctrl+Alt+T on keyboard to open terminal. When it opens, run the command below to install the package you just downloaded:
cd ~/Downloads && sudo apt install ./jdk-18_linux-x64_bin.deb
Here you may also double-click the .deb in file manager to install it.
3. Set JDK 18 as default:
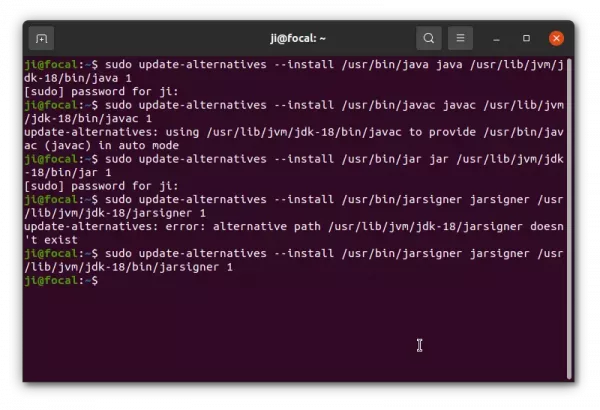
It installs the language files into ‘/usr/lib/jvm/jdk-18/‘ directory. To set it as default, do the following 2 steps one by one.
a.) Create symbolic links for the executable files:
sudo update-alternatives --install /usr/bin/java java /usr/lib/jvm/jdk-18/bin/java 1
sudo update-alternatives --install /usr/bin/javac javac /usr/lib/jvm/jdk-18/bin/javac 1
sudo update-alternatives --install /usr/bin/jar jar /usr/lib/jvm/jdk-18/bin/jar 1
Similarly, add links for other executable files (e.g., jarsigner, jlink, javadoc) as need.
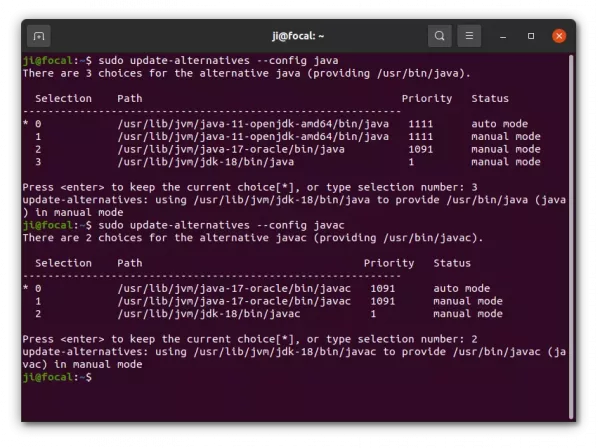
b.) Next, run the commands below one by one, and type number to select Java JDK 18 as default.
sudo update-alternatives --config java
sudo update-alternatives --config javac
sudo update-alternatives --config jar
When done, verify by running command in terminal:
java -version
javac -version

4. Set JAVA_HOME:
Option 1.) Set JAVA_HOME for current console, that will work until you close it:
export JAVA_HOME=/usr/lib/jvm/jdk-18
setenv JAVA_HOME=/usr/lib/jvm/jdk-18
Option 2.) To make it permanent, create and edit config file via command:
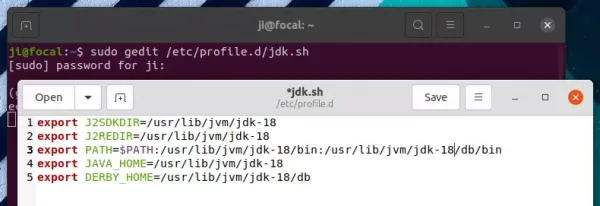
sudo gedit /etc/profile.d/jdk.sh
then add following lines:
export J2SDKDIR=/usr/lib/jvm/jdk-18
export J2REDIR=/usr/lib/jvm/jdk-18
export PATH=$PATH:/usr/lib/jvm/jdk-18/bin:/usr/lib/jvm/jdk-18/db/bin
export JAVA_HOME=/usr/lib/jvm/jdk-18
export DERBY_HOME=/usr/lib/jvm/jdk-18/db
And create anther one for C shell:
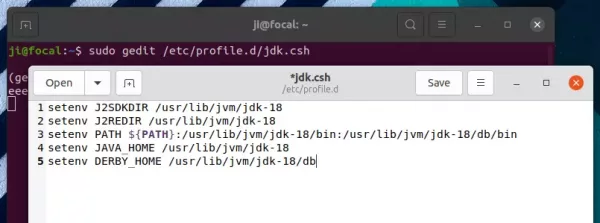
sudo gedit /etc/profile.d/jdk.csh
add following lines and save it:
setenv J2SDKDIR /usr/lib/jvm/jdk-18
setenv J2REDIR /usr/lib/jvm/jdk-18
setenv PATH ${PATH}:/usr/lib/jvm/jdk-18/bin:/usr/lib/jvm/jdk-18/db/bin
setenv JAVA_HOME /usr/lib/jvm/jdk-18
setenv DERBY_HOME /usr/lib/jvm/jdk-18/db
Finally, change the permissions via command, and it should take place at the next boot.
sudo chmod +x /etc/profile.d/jdk.csh /etc/profile.d/jdk.sh


