![]()
This quick tutorial shows how to change the default login screen display manager (e.g., gdm3, lightdm, kdm) in Ubuntu 20.04.
Ubuntu 20.04 Gnome desktop uses GDM3 as the default display manager. If you installed other desktop environments in your system, then you may have different display managers.
To change the default display manager, open terminal from system application launcher, and do following steps one by one.
1.) Check the current running display manager by running command:
systemctl status display-manager.service
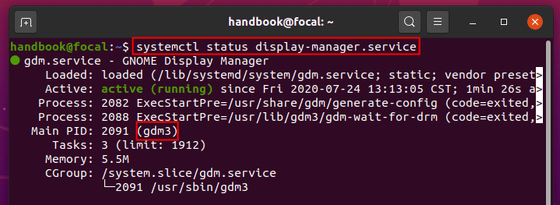
You may also run cat /etc/X11/default-display-manager to get the result.
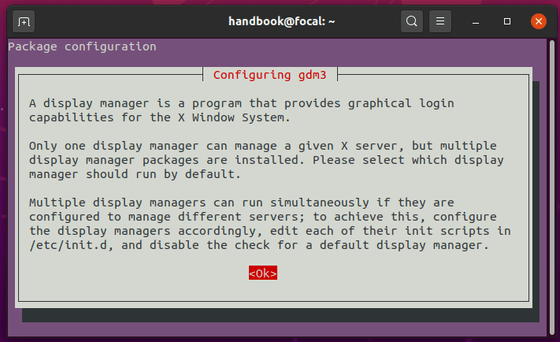
2. Run command to reconfigure the default manager:
sudo dpkg-reconfigure gdm3
NOTE: replace gdm3 in the command with the one you got in step 1).

3.) It will bring up the package configuration screen, if you have more than one display managers installed:
4.) Hit enter in the previous screen, then press Up / Down arrow keys to switch the display manager and hit Enter.
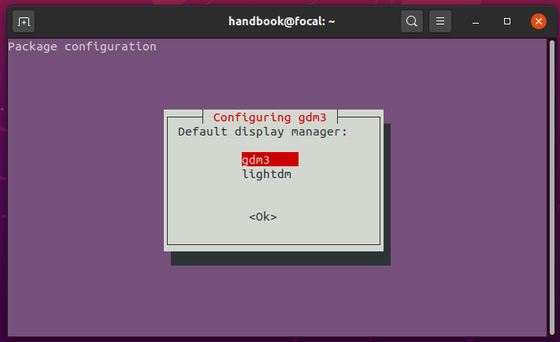
The change will be applied in next boot. Enjoy!