For those dual boot Windows 11 with Ubuntu or other Linux, you’ll find different time display in each system. And usually Windows shows incorrect clock time.
There are two time standards, localtime and Coordinated Universal Time (UTC, aka GMT). The local time standard is dependent on the current time zone, while UTC is the global time standard that is independent of time zone.
By default, Windows uses localtime, but Ubuntu uses UTC. So you get the different time in the dual boot. And the solution is set the same time standard in the two systems.
Method 1.) Set RTC to local time zone in Ubuntu:
Though it’s not recommended, set the Real Time Clock (RTC) to use local time zone just works.
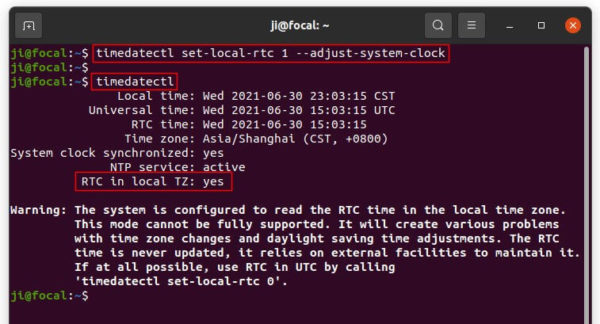
Firstly, open terminal either from system app launcher or by pressing Ctrl+Alt+T on keyboard. When it opens, run command:
timedatectl set-local-rtc 1 --adjust-system-clock
Then you can check system clock status via command:
timedatectl
And “RTC in local TZ: yes”, where TZ means time zone, tells localtime standard is in use.

As I said “it’s not recommended“, it warns that localtime standard may cause various problems with time zone changes and daylight saving time adjustments.
You can restore UTC time standard and do method 2 instead by running command:
timedatectl set-local-rtc 0
Method 2.) Enable UTC time in Windows 11:
If you’re now running Windows 11, you can easily enable the UTC / GMT time standard via following steps.
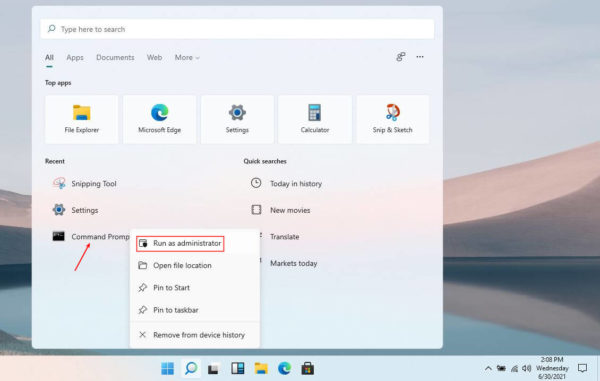
1. Firstly, click on ‘Search’ icon on task bar. Then search for and right-click on ‘Command Prompt’ and select ‘Run as administrator’.

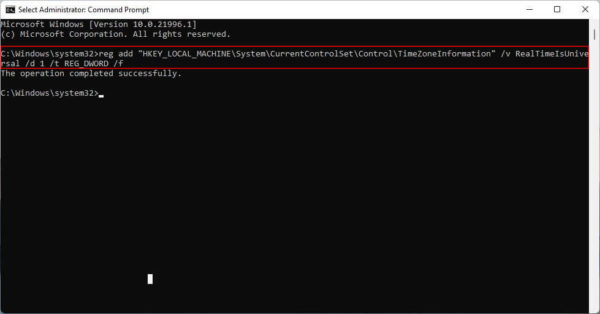
2. When command prompt opens, copy and paste the command below and hit run:
reg add "HKEY_LOCAL_MACHINESystemCurrentControlSetControlTimeZoneInformation" /v RealTimeIsUniversal /d 1 /t REG_DWORD /f
The command creates a registry key to tell Windows to use universal time standard.

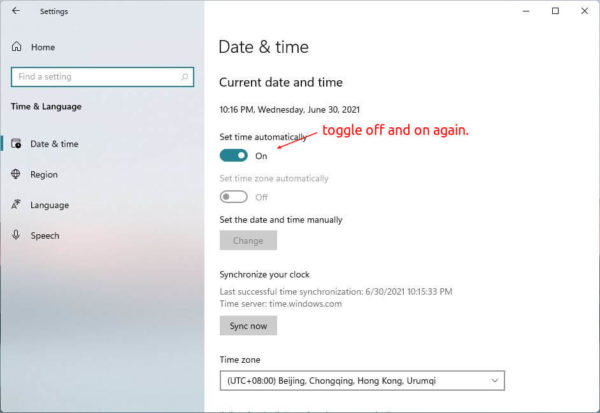
3. (Required in both methods) Open Settings and go to Time & Language. Then disable and re-enable ‘Set time automatically’ option will finally correct your system time in Windows 11.

That’s it. Enjoy!


