![]()
The upcoming Windows 11 has leaked online a few days ago. Here’s how to implement the new look and feel in Ubuntu 20.04, and/or Ubuntu 21.04.
Gnome has a large collection of extensions to get additional and optional functionality. You can use dash to panel to combine the top-bar and the left dock into single. And Arc Menu extension is available to replace the default system app launcher.
So your Ubuntu Desktop can be customized to look like the picture shows:
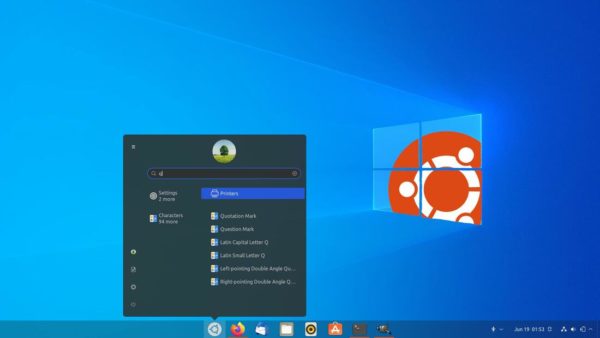
Install Dash To Panel to get single system panel:
1.) Install Dash to Panel extension:
For Ubuntu 21.04, simply press Ctrl+Alt+T on keyboard to open terminal and run command to install the extension:
sudo apt install gnome-shell-extension-dash-to-panel

For Ubuntu 20.04, though the previous command works I recommend to do following steps instead to get the newer version:
a. First run command to install required tools for installing & managing Gnome extensions:
sudo apt install chrome-gnome-shell gnome-shell-extension-prefs

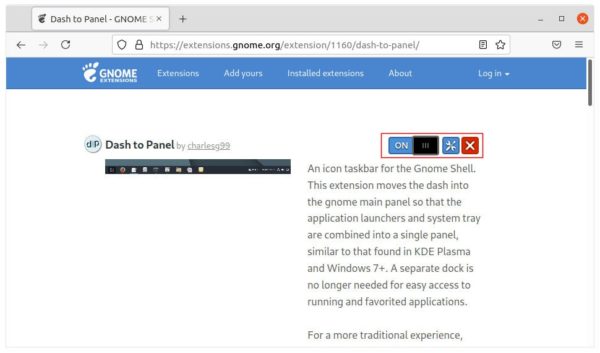
b. Next go to Dash-to-Panel web page and turn on the slider icon to install it:
If you don’t see the toggle icon, install browser extension via “Click here to install browser extension” link and refresh the web page.
Enable & Configure Dash to Panel:
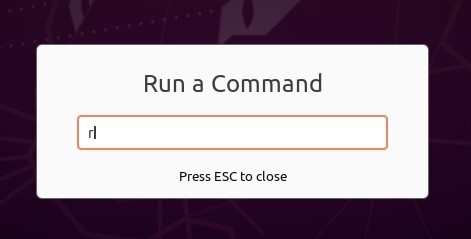
Once installed the extensions, restart Gnome Shell by pressing Alt+F2, type r in popup ‘Run a Command’ box, and hit Enter.
Or just log-out and back in if you’re running on Wayland session.
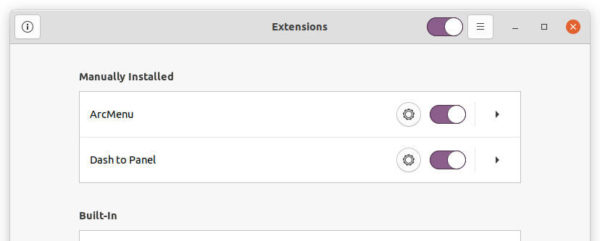
Next enable the extension via either Gnome Extension app or Gnome Tweaks tool.
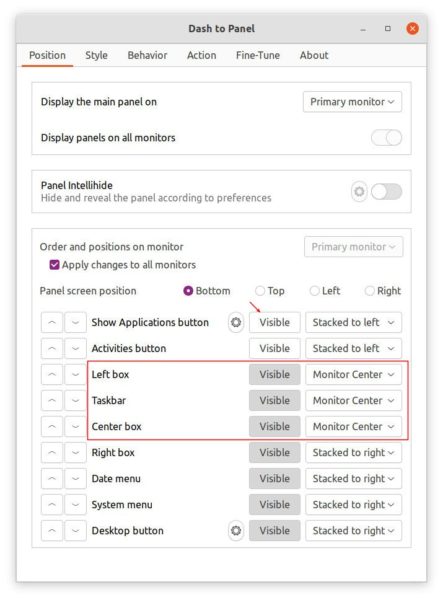
Finally right-click on blank area of the new panel, and go to ‘Dash to Panel Settings’. There do:
- Toggle off ‘Show Applications’ button.
- Change the position of ‘Left box’, ‘Taskbar’, and ‘Center box’. Use ‘Centered’ or ‘Monitor Center’ depends on your display.
- Change panel background opacity, icon size, etc in next tabs.
Install Arc Menu as Start Menu:
Though the Arc Menu is available to install via apt command, I recommend to install it from your web browser. That’s because the one in apt repository is the un-maintained versions though it still works in current releases.
1.) First run command to install the required tools, if you didn’t do it in previous step:
sudo apt install chrome-gnome-shell gnome-shell-extension-prefs

Next go to Arc Menu web page and turn on the slider icon to install it:
If you don’t see the toggle icon, install browser extension via “Click here to install browser extension” link and refresh the web page.
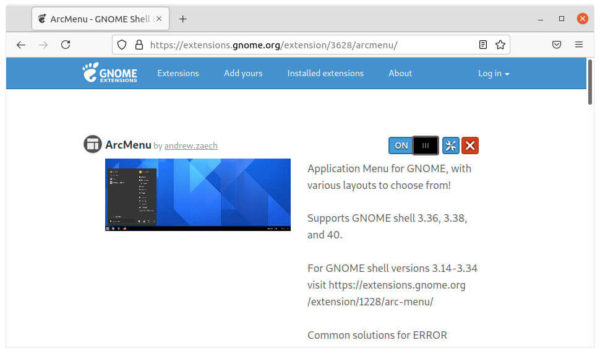
You may need to press Alt+F2, type r, and hit Enter to restart Gnome Shell, or log out and back in to enable the extension. If you don’t see the new start menu, enable Arc Menu via either Gnome Extension app or Gnome Tweaks tool.
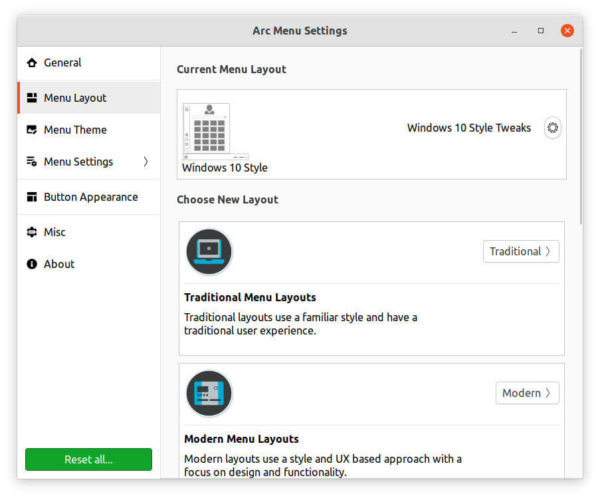
Finally right-click on new start menu and open settings. Under ‘Menu Layout’, choose the menu style. No Windows 11 menu layout so far. Here I use Windows 10 instead.
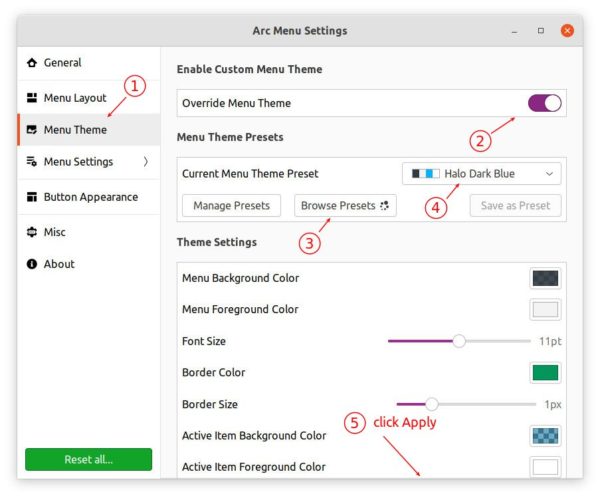
At ‘Menu Theme’ settings, do:
- Toggle on ‘Override Menu Theme’
- Click ‘Browser Presets’ and import.
- Choose a theme preset that you like, and tweak the theme settings.
- Finally click Apply button at buttom.
Under ‘Button Appearance’ choose your favorite icon for the start menu and enjoy!
![]()
How to Restore:
Simple turn off or remove the two extensions via Gnome Extension App will restore your desktop appearance. If not, restart Gnome Shell via Alt+F2 run command box or log out and back in.

